Category Archives: Kids Crafts
Open ended modelling activities for young children
Written by Julia Gorham and Heather Step During our Holiday Crafts programme, the children made pinch pots with homemade clay. They loved rolling the clay between the palms of their hands and pushing down hard with their thumbs in … Continue reading
Nature Mobiles
One of the things I love about this school is that it is set in a park. At the Fields Montessori Pre-School and Playgroup in Parkmore Sandton we enjoy many nature walks. This craft combines the nature walk with a … Continue reading
Mother’s Day card and crafts for kids
It’s nice to create something heartfelt from a young child to give to their mother on Mother’s Day, so we’ve come up with some ideas you could use to create a nice card or art work for her. For very … Continue reading
Mark Art Part of Your Child’s Daily Routine
By Julia Gorham Incorporate art-making into your child’s playtime at home. Make an art-zone if you want to isolate the mess. Tape down paper for them to draw on and spill on, and make a smock out of old … Continue reading
Cork sailing boats from cork tiles
What do you do when you don’t have enough corks to make sailing boats for a “cork sailing boats” art activity that is coming up? Look for alternatives, of course! After visiting a hardware store and sharing my dilemma of … Continue reading
Bats and Spiders Halloween crafts
These art activities make use of a striking colour contrast: between luminous oranges and yellows against black, silver glitter against black and white against black. It’s a fun educational theme to teach all about spiders and bats as well as … Continue reading
Dinosaur themed art activities
All kids love dinosaurs! The prehistoric creatures are a curiosity and a lot of fun to learn about. Here are some ideas for doing some crafty art activities with dinosaurs. Handprint Dinosaur: A super fun activity for toddlers, because all … Continue reading
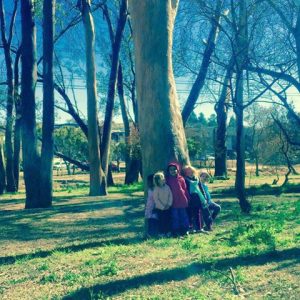
Tree Rubbings
By Julia Gorham Tree rubbings are a great way to explore the garden or a park with your child, allowing them to experience the patterns of different textures from trees. The Fields Montessori children loved this nature activity. You … Continue reading
Fresh Flower Crowns
What a great way to celebrate spring with your children with fresh spring flowers ! You will need: 1 A4 white cardboard – Crayons, or pastels Fresh spring flowers Stapler To do: Fold the A4 Cardboard and … Continue reading
Sewing card crafts
Threading is a great activity to strengthen your child’s fine motor skills! You will need: A picture printed on A4 cardboard Scissors Wool A punch Crayons, pencil crayons etc. To do: Print a template of your choice e.g. car, … Continue reading